| Painting for Beginners | 您所在的位置:网站首页 › paint a picture of your bit › Painting for Beginners |
Painting for Beginners
|
Pin3KShare15K19K Shares
This is a comprehensive guide for absolute beginners looking to get started in painting. In writing this, I considered what I would do if I had to go back and learn painting all over again. I have broken the guide into 7 simple steps you can follow: Step 1. Consider Why You Want to Take up Painting and What You Want to Get out of It Step 2. Pick Your Medium (Acrylics, Oils or Watercolors) Acrylics – The Beginner’s Choice Oils – The Master’s Choice Watercolors – The Untamed Beauty Which Should You Go With? Step 3. Get Your Supplies Step 4. Get Familiar with the Fundamentals of Art Step 5. Decide What You Want to Paint First Step 6. Create Your First Painting Step 7. Review and Improve Bonus Tips Want to Learn More? Thanks for Reading! John Singer Sargent, Simplon. Pass, 1911 John Singer Sargent, Simplon. Pass, 1911
(Bonus: Click here to join my free 4-part workshop, Painting the Landscape.) Step 1. Consider Why You Want to Take up Painting and What You Want to Get out of ItBefore you go out and buy all your new art supplies and start throwing paint onto the canvas, you should consider why exactly you want to take up painting and what you want to get out of it. Your answers will determine how you proceed and what you should focus on learning. I don’t believe that there is a static learning path that everyone must follow to master painting. Everyone has different tendencies, interests, and natural skills which determine the optimal learning path they should take. For example, some people do not have the patience to sit down and accurately render every tone and detail of a subject. Therefore, they may be better suited to learn color and brushwork from the Impressionists, rather than the rigorous practices of the Russian academic painters. Or maybe you have no interest in breaking into the commercial art world and just want a fulfilling hobby. In that case, you may want to take a more relaxed approach to how you learn. Or maybe you want to become a master realist painter like John Singer Sargent or Joaquín Sorolla. To get anywhere near this goal, you would need to follow a dedicated and rigorous training regime that focuses on drawing and the other fundamentals of painting (color, value, composition, etc).  Joaquín Sorolla, Sewing the Sail, 1896 Joaquín Sorolla, Sewing the Sail, 1896
Whatever the case, it is important that you have self-awareness of why you are doing this in the first place and what you want to get out of it. If you have not already, take a second to think about it. You may even want to share your answer in the comment section at the end of this post. Step 2. Pick Your Medium (Acrylics, Oils or Watercolors)Next, you should decide on a medium to focus on, at least for the short term. This will allow you to really get a feel for how the medium works, so that you can then pay more attention to the big-picture aspects of painting, like color, composition, value, etc. The major choices are oils, acrylics, and watercolors. There are some other options, like gouache and water-mixable oils, but I won’t touch on these in this guide. But there is no right answer here. Every medium has pros and cons. Here is a crash course on the different mediums to help you decide which suits you: Acrylics – The Beginner’s ChoiceAcrylics are widely favored by those just starting out with painting as they are easy to use and do not require any special supplies. The downside is they dry very fast. Acrylics may suit you if: You are a complete beginner and do not want to worry about the complexities of oil and watercolor painting. You want an easy cleanup time. You are painting on a limited budget. You enjoy experimenting with mixed media. You are sensitive to the harsh chemicals involved with oil painting.The downsides of acrylics are: The paint dries very fast. This means you only have a limited amount of time whilst your paint is responsive on the canvas. Some colors darken as they dry (the colors which are lighter tend to have a greater change).I personally started with acrylics many years ago. Below is one of my childhood paintings in acrylics. I eventually moved to oils after getting frustrated by the quick drying time of the paints. But acrylics were great for developing a broad understanding of painting whilst I was a beginner. 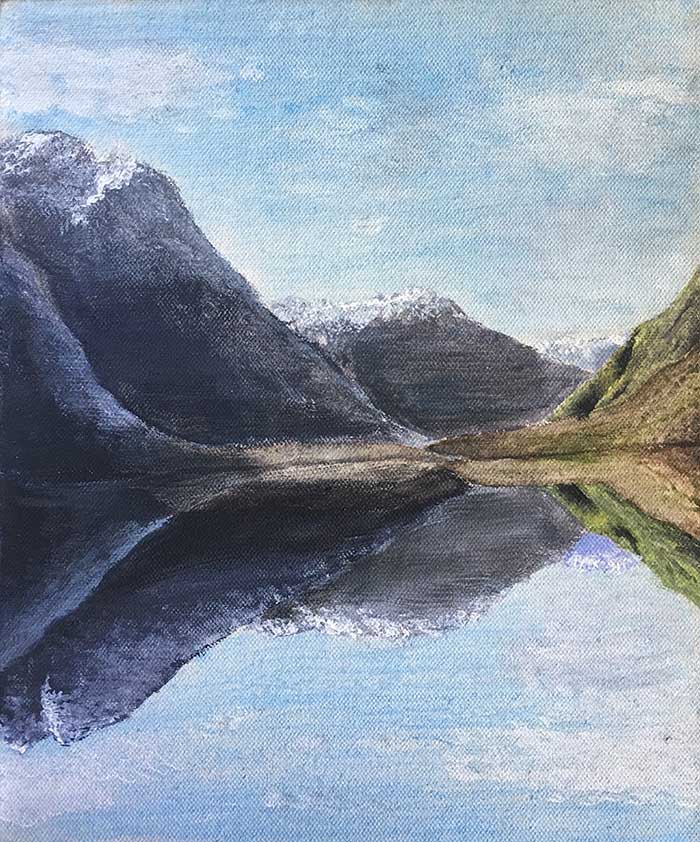 Dan Scott, Early Painting – Mountain Reflection
Oils – The Master’s Choice
Dan Scott, Early Painting – Mountain Reflection
Oils – The Master’s Choice
Oil paints are the most widely used medium among professional artists for a number of reasons: They are versatile. You can vary the drying time and consistency of your paint dramatically using paint thinners and additional oil. This allows you to work with a wide range of painting techniques, including blending, glazing, and scumbling. They were favored by the all-time greats of painting. Oil paintings seem to be held in higher regard by art collectors compared to acrylic paintings (there are of course some exceptions to this).You really cannot go wrong with oil paints. If you are not sure where to start, I suggest either jumping straight into oils or starting with acrylics with a view of jumping over to oils once you are more developed. There are some fantastic acrylic painters, but many of them paint in a very contemporary style. The traditional painting techniques which were used by the old masters are much better suited to oil painting. If you think oil painting is too complex for you, then I urge you to reconsider. There are really only a few ‘rules’ that you need to understand in oil painting and the rest is very similar to acrylic painting. Tip: For those of you who are concerned about the harsh solvents used in oil painting, like turpentine, then check out odorless solvent. It makes oil painting much more pleasant in my opinion. I use the artist quality solvent by Gamblin.  Dan Scott, Secrets on the Lake, 2017
Watercolors – The Untamed Beauty Dan Scott, Secrets on the Lake, 2017
Watercolors – The Untamed Beauty
Watercolors are generally considered to be the most difficult to pick up due to the untamed nature of water and the fact you are not able to do much re-working of errors (as the paper can only absorb so much water). However, if mastered, watercolors can produce stunningly elegant paintings. For this reason, I recommend you start out with either acrylics or oils before venturing into watercolors. However, watercolors are a fantastic complement to your acrylic or oil painting as they train a different skill set. For example, John Singer Sargent was famous for his meticulous portraits using oils, but he used watercolors to paint impressionist and relaxed landscapes and portraits. These watercolor paintings probably felt very refreshing for Sargent who would have been accustomed to the lengthy and tedious portrait painting sessions.  John Singer Sargent, Carrara, Working, 1911
Which Should You Go With? John Singer Sargent, Carrara, Working, 1911
Which Should You Go With?
There is no right answer here, but if you are just starting out in painting then I recommend you start with acrylics or oils. But feel free to start with watercolors if you are up for the challenge. Also, this is not to say you must choose a medium and ignore the rest. I encourage you to try all different kinds of mediums, but have one which you really focus on and get familiar with. It is better to be a master of one medium, than be average at all mediums. Step 3. Get Your SuppliesIt’s time to stock up on art supplies. But make sure you read all of this section first before you start buying every type of brush or every color of paint – you do not actually need that much stuff! The supplies you get will vary depending on the medium you decide to go with. In a broad sense, all you need is: An easel to hold your artwork; Canvas (for acrylic or oil painters) or paper (for watercolor painters); A palette for color mixing; Brushes (suitable for your chosen medium); Palette knives; Paints; Solvent (if oil painting); and Paper towels (for wiping your brush between strokes).That is it really. Painting can be as simple as you want to make it. You will be able to find all this at your local art store. If you are an absolute beginner, it may be worth starting with a beginner package that includes most of the basic supplies you would need. You can then upgrade later on. My main suggestion is to keep it simple and purchase quality where it matters, like your brushes, canvas, and paint (a premium quality easel will not make you a better painter). As Richard Schmid wrote in his book Alla Prima: “If Michelangelo had possessed only a broom and a bucket of mud, he could still have painted the Sistine Chapel ceiling, and it would have been just as much of a masterpiece!”  (Every artist should have a copy of Alla Prima. It’s a fantastic book written by a master painter.) As for the colors, I suggest you start with a limited palette that has red, blue, yellow (the primary colors), white, and an earth tone like raw umber. Here is a good starter palette: Cadmium red Ultramarine blue Cadmium yellow Titanium white Raw umberI go into more detail on painting supplies in this guide. You can also see what I use and recommend on the supplies page. (See the supplies page for details about what I use and recommend.) Step 4. Get Familiar with the Fundamentals of ArtI am a big believer in learning efficiently rather than just putting in time for the sake of it. You could practice for years and hardly improve if you don’t know what you are doing. This is where the fundamentals of art come into play – color, value, composition, edges, brushwork and technique. These are what I consider to be the core pillars of painting. It is important that you get familiar with them early, as they will help you understand what exactly is going on when your brush hits the canvas. Learning these fundamental areas will benefit every stroke you make. Here is a summary of the fundamentals: Color: We are all familiar with color, so much so that we take it for granted. Few people fully understand and appreciate what color actually is. I find it easier to comprehend color in terms of hue, saturation, and value. These are the three elements that make up a color. Hue refers to where a color is located on the color wheel. Red, blue, yellow, green—these are all different hues. Saturation refers to how rich, intense, or vibrant a color is. Value refers to how light or dark a color is. Learn these three terms and learn them well, as you will encounter them with every artwork you create.  Childe Hassam, The Aquarium with Gold Fish, 1912 Childe Hassam, The Aquarium with Gold Fish, 1912
Value: Value is an element of color, but it is generally considered as a separate fundamental area due to its importance to painting. Every color has an underlying value somewhere between white and black. For example, take the following painting by Claude Monet.  Claude Monet, Fishing Boats, 1886 Claude Monet, Fishing Boats, 1886
If I take color out of the equation, we are left with nothing but the different values ranging from light gray to almost black. This painting has a strong value structure, as you can clearly make sense of it without color. A strong value structure is not essential by any means (just look at many of the great Impressionist paintings) but it certainly helps in giving your painting a solid foundation. If you paint with accurate values, then you have more leeway with your use of brushwork, color, and detail. 
Composition: You will hear all kinds of complex terms, “rules” and theories used to explain composition in painting. Things like… Focal point Rule of thirds Golden mean Horizon line Leading lines Harmony Rhythm Movement Balance …. and so on. But really, there are only two questions that are important for creating great compositions. What do you want to say? How are you going to say it? That is it. None of the other stuff matters all that much. Let’s dive into those questions a bit deeper…What do you want to say? In other words, if your painting could speak, what would it say? If you don’t know, then you are working blind. Also, this does not need to be some deep and philosophical statement. It could be as simple as…. “I want to capture the way light is bouncing off the river surface.” But it is important that you know what you want to say – a big idea you want to communicate. How are you going to say it? Or, how are you going to arrange all the elements in your painting to work in harmony and communicate what you want to say? Think of all your individual strokes, shapes, lines, colors, and textures as tools at your disposal.  Claude Monet, Etretat the Aval Door Fishing Boats Leaving the Harbour, 1885 Claude Monet, Etretat the Aval Door Fishing Boats Leaving the Harbour, 1885
Edges: An edge is what separates two shapes. It can be either hard, soft, or lost. Hard edges have a clean transition between the two shapes; soft edges have a smooth transition; and lost edges are so smooth you can barely see them.  Dan Scott, Three Boats at Kingfisher Bay, 2016 Dan Scott, Three Boats at Kingfisher Bay, 2016
Brushwork: The physical marks left by your brush (or your palette knife, finger, or anything else you use to paint with). This is an overlooked aspect of painting, which is odd because it is what makes a painting look like a painting. If not for brushwork, we may as well just take a photograph or practice digital art rather than traditional art. ") Dan Scott, Honeymoon Bay, Tasmania, 2019 – Close-Up Dan Scott, Honeymoon Bay, Tasmania, 2019 – Close-Up
Technique: How well you are able to perform certain actions. Good technique will develop over time as you gain experience and become more comfortable with your brush and paints. But you need to be careful of any bad habits which you may pick up along the way. This could be the way you hold your brush, or the types of strokes you make. Bad habits can be incredibly difficult to fix after you have been practicing them for a number of years. To develop good painting technique, I suggest you carefully watch masters paint. Observe how they hold their brush, how they apply paint to canvas, how they mix colors, and so on. Step 5. Decide What You Want to Paint FirstOne of the most challenging aspects of painting happens before you pick up your brush – selecting a subject to paint. The perfect subject should be inspiring and challenging. You should feel the need to paint it. Here are some questions to help you determine if a subject is worth painting: Is there a “big why”? A single idea that makes you want to paint it. Is there a clear and identifiable color harmony? Does the subject have an interesting design (think about the arrangement of shapes, forms, lines and colors)? Is there anything you can do to improve on the subject? Are you capable of painting it? Do you have the supplies required to paint it? What problems will you encounter painting it? Does the subject provide you with opportunities to challenge yourself and demonstrate your abilities? Does the subject inspire you? Can you see a finished painting at the end of it all? If so, do you like what you see?Ask yourself these questions next time you are not sure if a subject is worth painting. Note: These questions are not necessarily there to be answered, but rather to make you question and explore the subject before you commit to something more. As an example, the following photo is something I would like to paint. Here is why: I love the contrast between the light greens getting hit by light and the foreground in shadow. This is what I would focus on capturing if I were to paint it – my big idea. The composition is interesting. There is a pleasing balance between active and quiet places. I can see myself painting this. Step 6. Create Your First Painting
You are now ready to create your first painting. Just a word of warning though, it will be harder than it looks! The master artists make it look effortless, but don’t forget they have been painting for many years, even decades in some cases. My main suggestion for your first painting is to start general; try to capture your initial impression of the subject. Think about the subject in terms of shapes and colors. You can then refine the painting and add more detail. As an example, I will run you through one of my paintings. Below is the reference photo I painted from. 
I started by loosely painting in the major colors and shapes with a light wash. 
I then started to build up the form and structure. 
The finished painting is below. This should give you an idea of how rough and general I start a painting. Of course, some subjects require more delicate attention, but that is something you need to consider on a case-by-case basis.  Dan Scott, Sunset Study, Kingfisher Bay, 2017 Dan Scott, Sunset Study, Kingfisher Bay, 2017
You can see more step-by-step paintings on the video page. Here is an example of a simple landscape painting: Tip: Be proud of your first artworks, even if they do not turn out as planned. One day, you will look back and see how far you have come. Below is one of my early paintings from when I was a child. Not perfect by any means (I even forgot to paint the right side of the ocean…) but it reminds me of how I started. Also, don’t compare your first few paintings to the works of other artists. Most people do not share their early or failed works; you only see their best. 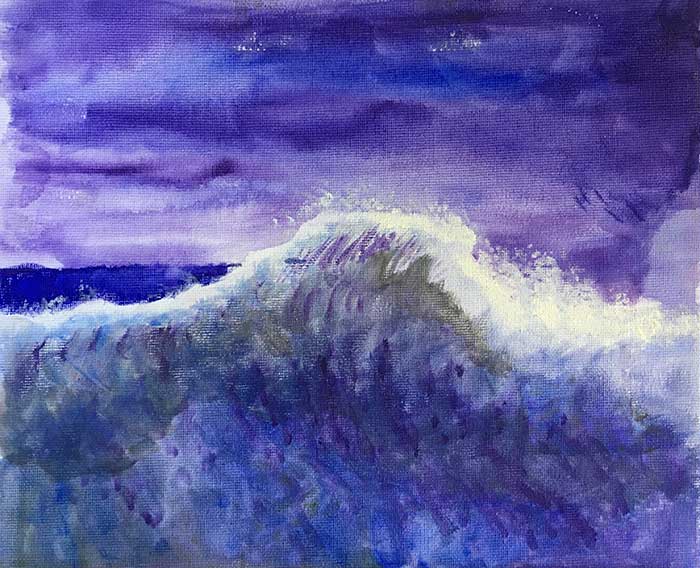 Dan Scott, Early Painting – Impressionist Wave
Step 7. Review and Improve
Dan Scott, Early Painting – Impressionist Wave
Step 7. Review and Improve
Once you have created your first painting, it is time to take a step back and review what went right, what went wrong, and where you can improve. Unless you are some kind of prodigy, your first painting probably won’t be a masterpiece but that is ok. Everyone starts as amateurs, even the masters. Look at your painting like an art critic. Here are some questions to ask yourself: What aspects of the painting do I like? What aspects would I change? What is the mood of the painting? What is my first impression of the painting? I suggest you take a break from looking at the painting for a day or two, then come back to it. Do the colors work or do they appear muddy? Is the composition pleasing? Is there any visible brushwork that adds to the painting? Have I captured the overall likeness of the subject? Is there anything in particular that irritates me about the painting? Have I captured the perspective accurately? Does the painting appear cohesive? Fisherman in Valle d’Aosta, John Singer Sargent, 1907
Bonus Tips
Don’t worry about what other people think. Accept criticism but do not let it be the main driver of what you do.
Engage in the community. Enter competitions, visit galleries, talk to other artists, read artist blogs, subscribe to artist newsletters, etc. The more engaged you are, the more inspired you will be.
Try not to be intimidated by artists who are more skilled. There will always be someone more skilled, experienced, knowledgeable, or technical than you. Look to them for inspiration rather than be intimidated by them.
Don’t worry that much about developing a memorable or unique style if you are just starting out. It will develop over time with experience.
Focus on the fundamentals—color, value, composition, edges, brushwork, and technique. These areas will benefit every stroke you make and will compound your level of improvement over time.
Research the masters who came before us. Learn about how they lived, studied, and worked. This will provide you with a constant source of inspiration and knowledge.
Don’t be afraid to experiment and try new things.
Be careful of gimmicky techniques, secrets, rules, or methods.
Be open-minded and flexible with how you learn.
The only secret to becoming a great painter is to learn, practice, review, and improve. Fisherman in Valle d’Aosta, John Singer Sargent, 1907
Bonus Tips
Don’t worry about what other people think. Accept criticism but do not let it be the main driver of what you do.
Engage in the community. Enter competitions, visit galleries, talk to other artists, read artist blogs, subscribe to artist newsletters, etc. The more engaged you are, the more inspired you will be.
Try not to be intimidated by artists who are more skilled. There will always be someone more skilled, experienced, knowledgeable, or technical than you. Look to them for inspiration rather than be intimidated by them.
Don’t worry that much about developing a memorable or unique style if you are just starting out. It will develop over time with experience.
Focus on the fundamentals—color, value, composition, edges, brushwork, and technique. These areas will benefit every stroke you make and will compound your level of improvement over time.
Research the masters who came before us. Learn about how they lived, studied, and worked. This will provide you with a constant source of inspiration and knowledge.
Don’t be afraid to experiment and try new things.
Be careful of gimmicky techniques, secrets, rules, or methods.
Be open-minded and flexible with how you learn.
The only secret to becoming a great painter is to learn, practice, review, and improve.
 Dan Scott, Honeymoon Bay, Tasmania, 2019
Want to Learn More? Dan Scott, Honeymoon Bay, Tasmania, 2019
Want to Learn More?
You might be interested in my Painting Academy course. I’ll walk you through the time-tested fundamentals of painting. It’s perfect for absolute beginner to intermediate painters. Thanks for Reading!I appreciate you taking the time to read this post and I hope you found it helpful. Feel free to share it with friends. Happy painting! Dan Scott 
Draw Paint Academy About | Supply List | Featured Posts | Products |
【本文地址】